Sump Pump Installation: Complete 9-Step Process For Beginners

A sump pump is one of the most vital parts of any drainage system, but the sump pump installation can be challenging. It requires much effort and a thorough understanding of sump pump installation and its process.
Choosing the right location for your sump pit is also crucial; otherwise, it may result in future repairs that take longer and cost more money.
In this guide, I will show you how to do the sump pump installation in the right location that keeps your basement mold-free and prevents floods.
Sump Pump Installation: Tools Required
Using various specialized tools to install a complete basement drainage system in new construction or an existing basement may be necessary. And for most sump pump installations or replacements, you will need the following tools:
- Sump pump
- Pipe wrench
- Power drill
- PVC pipe
- Drain cap
- Adaptors
- Check valve
- Rubber wash
- Glue
- Gloves
- Pickaxe
Now you have almost all the tools necessary for your sump pump installation.
How To Install A Sump Pump?
Installing a sump pump is often daunting and requires much effort. However, it can be fascinating if you are interested in specific DIY tasks. So let’s begin with the installation step-by-step.
Right Location
Before you begin the installation process, you must consider where you want to install your sump pump and choose the correct location. Installing a sump pump in a finished basement will be more difficult since we’ll have to dig deeper. Before starting, thorough research on the spot is essential. When looking for a location, prioritize the area where the water collects.
Avoid locating your pump directly beneath significant appliances such as water heaters, furnaces, or washing machines that have drained on their own. These appliances frequently vibrate and can cause instability in the sump pit area.
If you are familiar with GFCI, you already know that the sump pump installation should be near a GFCI (Ground Fault Interrupter Outlet). The sump pump will be connected here. The closer it is to the GFCI, the better.
If there isn’t a plug where you want to install your pump, you must reach out to a certified electrician and have him install one. It’s because you won’t be able to install the sump pump unless you have a plug nearby!
Dig A Hole and Install the Sump Pump
Digging a hole is the most challenging part of the sump pump installation. Note that you will always need a large pit when installing a sump pump on the basement floor.
Make a note of the measurement before digging. Ensure that the hole you’re digging is about six inches deeper than the sump. The width should be 10 inches wider than the sump. Also, place a three-inch layer of gravel at the bottom of the hole.
Increase The Gravel
You can consider calling someone for assistance if necessary. Place gravel around the sump you have set inside the hole.
You must ensure that you have left at least two inches exposed at the top of the sump. And once you have finished adding gravel, your task is complete; get your sump pump ready for use.
Connect the Discharge Pipe
The discharge pipe is responsible for transporting water from your sump pit to the outside of your home. If you bought a submersible pump, it would come with a discharge hose to connect it to the discharge pipe.
You must purchase a discharge hose if your pump is not submersible. The discharge pipe should be at least 2 feet higher than the sump pit’s top and gradually slope downward from the pump to the outside of your home.
Be sure to attach a drain cap at the end of the hose to drain the water.
Connect The Adaptors
Next, you have to connect the adaptors to the discharge pipe. Take the glue, PVC discharge pipe, and the male adaptor; attach the adapter to the pipe with glue. Repeat the process with the female adaptor.
After you have done this, take the female adapter, and attach the glued male adapter with the PVC discharge pipe into the pipe’s female adapter.
After you finish with the adapters, make a hole in the discharge pipe using the power drill. Make sure the pump is six inches lower than the drilled hole here. The hole will be known as a ‘weep hole.’ When you turn the pump off for priming, the water will flow back into the pump through this weep hole.
Check Valve Installation
The check valve is a vital part of your drainage system and should install as close to the pump as possible on the discharge pipe. This will help to prevent any water from backing up into the pit.
If you bought a submersible pump, attach the check valve to the discharge pipe before it enters the sump pit. Wrap it with a rubber washer and tighten it with a wrench. If your pump is not submersible, install the check valve at the bottom of your sump pit. A rubber washer should be placed around it and tightened with a wrench.
The check valve, whichever type it is, should also be attached to the discharge pipe’s end closest to the pit opening using a rubber washer. Now, place the pump in the sump and prepare to run the water out of your house.
Connect Drainage System
The next step is to connect your drainage system to the pump’s hose.
The connecting process may vary depending on where you place the drainage system and the type of plumbing you have. So read the instructions for your specific model before working on the drainage system.
Installing Pit Cover
The sump pump pit cover is the final step in installing your sump pit system. It will keep debris and animals out of the pit while protecting the pump from the other components.
Test Your Pump
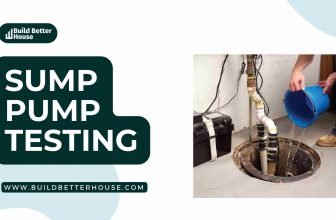
Fill the pit with a few gallons of water. When the water level reaches the float valve on the pump, turn it on and drain the water.
If everything is in working order, the water level in the pit will gradually decrease until it is gone. If it doesn’t, the float valve may need to be adjusted. (Some indoor sump pumps have an indicator light to indicate that they are working.)
Also, look into the discharge pipe and check the valve for leaks.
How To Maintain A Sump Pump?
Now that you have completed the sump pump installation and it is working, there are a few things to keep in mind to ensure that it continues to function correctly:
1. Keep the pit clean
A sump pump installation alone is not sufficient for it to function independently. You should also maintain and keep your pump in good working order.
You should try to remove the solid particles that accumulate in the pit by hand, but if you see sludge building over time, you should consider cleaning out the sump pit more frequently. When dust or debris settles in the water, it can reduce the efficiency of your pump.
2. Check Your Pumps Regularly
Always check your pumps, if not regularly, at least once a month. If you have a submersible pump, inspect the intake screen for blockages at least once a month. But if you reside in a region prone to poor weather or flooding disasters, you should undertake maintenance more frequently.
3. Check The Water Level
Regularly check the water level in your sump pit, especially if you live in a flood-prone location. If the water level rises past the pump’s intake level, the pump may overheat or fail. Turn off the power and look for the cause of the leak if the water level begins to rise.
4. Be aware of the weather
Be ready for adverse weather to avoid a sump pump failure, and keep an eye out for weather forecasts that predict heavy rain or severe winds.
Make sure to follow these tips to improve the efficiency of your pump.
How Can You Tell If Your Sump Pump Needs To Be Replaced or Repaired?
The following are some symptoms of a faulty system. If you notice any of these signs in your sump pump, it is probable that your pump has an issue with its functioning and needs replacement.
1. High Noise
Excessive noise from your pump indicates damaged or worn components. A sump pump’s unexpected noise might be because of impeller damage or motor bearing failure.
A damaged or jammed impeller may cause grinding or rattling noises in your pump. If you notice excessive noise from your pump, you should contact a technician immediately. Otherwise, the noise caused by minor damage could cause your pump to fail.
2. Irregular Cycling
Frequent turning on and off the drain pump, even during periods of heavy rain, indicates a problem. It may be a misaligned float switch, or perhaps the pump does not start even when the basin is just a few inches deep.
Poor wiring can also cause the pump to turn on and off randomly. A short circuit in a house’s or equipment’s electric system will cause the pump to start and stop intermittently.
3. Excessive Vibration
The suction of solid debris can damage or bend the sump pump’s impeller. The impeller is balanced, reducing wear on the rotating shaft. It will be unstable and exert pressure on the shaft if it is damaged or bent.
The pump makes noise because the impeller is unbalanced. If the unbalance is not corrected quickly, it can damage various parts of the pump or cause it to fail. As a result, you must identify the source of the vibration and correct it as soon as possible to ensure the proper function of the pump.
4. Visible Rust
A corroded battery terminal could cause the brown content on the pump body, but in some cases, the discoloration is due to the bacteria. Because of its color, it is considered an iron bacterium, which eats iron in the water, causing discoloration. Gel-like substances can clog pipes and sump pumps in a variety of situations.
Although iron-oxidizing bacteria are not harmful to human health, they can disrupt water flow from sewage systems.
5. Infrequent Pump Usage
Infrequent use of the sump pump will reduce its operating efficiency. If the pit is not in use, debris and dust are more likely to settle in it.
By testing the pump in heavy rain regularly, you can detect problems with your pump early on and support the internal mechanisms of the equipment.
6. Older Pumps
The sump pump’s maintenance and proper cleaning will help extend its life span, but no machine will function like new, and no pump will last forever. If your pump is 7 years or older, it would be that you start thinking of a new sump pump installation.
Conclusion
Now that you’ve successfully finished your sump pump installation, you can relax knowing you did it correctly without a plumber’s assistance. You can take a few additional steps to ensure your basement never floods again.
Sump pump alarms come in various shapes and sizes, and that design to notify you when the water level reaches a certain level or the pump cannot remove the water quickly enough. You can even upgrade to the best sump pump alarm, which will send alerts directly to your phone no matter where you are.
FAQ
How much does it cost for a sump pump installation?
A new sump pump installation typically costs between $1000 and $1500, depending on the type of pump and the situation’s complexity. Other circumstances, such as buying any other necessary product, may also affect the price.
If I install gutters on my home, do I still need a sump pump?
In some cases, gutters built on a home can deflect water that might otherwise end up in the basement. However, this is not a sure thing.
What happens to my sump pump if the power goes out?
Battery backup sump pumps driven by a 12v high-performance battery would be ideal. This enables your sump pump to keep pumping even if the power goes off.
Does my house need a sump pump?
If you live in a flood-prone area, severe rain, or storms, we recommend that you install a sump pump to ensure the safety of your home and family.


