5 Reasons Why Your Sump Pump Is Gurgling + 5 Solutions

Wondering why your sump pump is gurgling? Many homeowners experience this issue with their sump pump, but fortunately, solutions exist.
In this article, I will explain the top five reasons why your sump pump is gurgling and provide five effective solutions to fix the problem.
So, continue reading to find DIY solutions for your sump pump making gurgling noise!
What Does A Gurgling Sound Indicate In A Sump Pump?
If you find out that the sump pump is gurgling, it could indicate a problem.
When a sump pump is gurgling, it could mean the air is trapped in the discharge pipe, preventing water from flowing out of the sump pit. This can lead the sump pump to work harder than it should, leading to increased wear and tear and potentially causing it to fail.
So, it’s essential to address why the sump pump is gurgling as soon as possible to prevent further damage.
Top 5 Reasons Why Your Sump Pump May Be Gurgling
Now that we understand what a sump pump is and what a gurgling sound could indicate let’s explore the top 5 reasons why your sump pump is gurgling.
Clogged Discharge Pipe
One of the common reasons why your sump pump is gurgling can be a clogged discharge pipe.

Over time, debris, such as dirt, leaves, and other materials, can accumulate in the discharge pipe, causing it to become clogged. This can prevent water from flowing from the sump pit, leading to a gurgling sound.
Solution: Steps To Unclog A Discharge Pipe
If you suspect that your sump pump discharge pipe is clogged, there are a few steps that you can take to unclog it:
Step 1. Locate The Discharge Pipe
Typically, the discharge pipe on a sump pump system will be on the top of the pump itself. A vertical pipe made of PVC or another type of durable plastic material goes upward from the pump and extends outside your home, near the foundation.
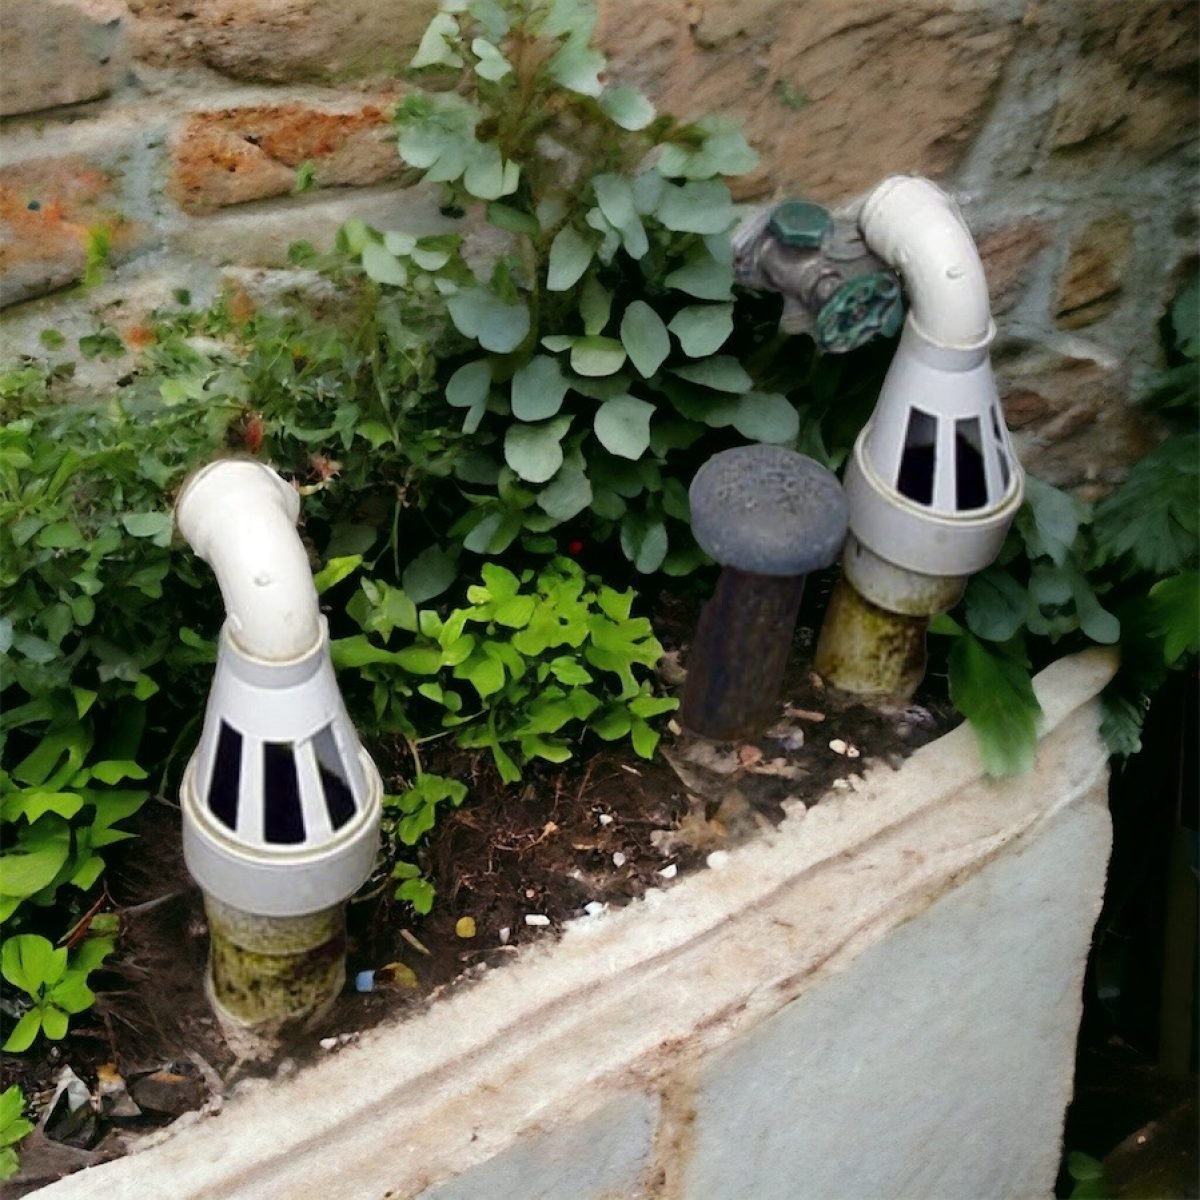
The discharge pipe carries water and other fluids away from the sump pump and out of your basement or crawl space. The pipe typically will be 1 ½ to 2 inches in diameter.
Make sure to turn off your sump pump before you begin. This will prevent water from continuing to flow through the pipe while you’re working on it.
Step 2. Clear Blockages
Take away the screen from the discharge pipe’s end and look for any debris or blockages.
If you can see any visible blockages, use a small shovel or your hands to remove them. To protect your hands from any debris, make sure you’re wearing gloves.
Step 3. Use Plumbing Snake
If you can’t see any visible blockages, you may need to use a plumbing snake to clear the pipe. Insert the snake into the pipe and turn it clockwise to break up clogs. Once you’ve broken up the clog, turn the snake counterclockwise to remove it.
Step 4. Flush The Pipe
Make use of a hose to clean the interior. Once you’ve cleared the blockage, reattach the screen and pour water into the pit until the float switch activates the pump to ensure everything is connected correctly.
Malfunctioning Check Valve
A broken check valve may also be why your sump pump is gurgling. A check valve prevents water from coming back in once pumped out. If the check valve is not working properly, water can flow back into the pit, causing a gurgling noise.

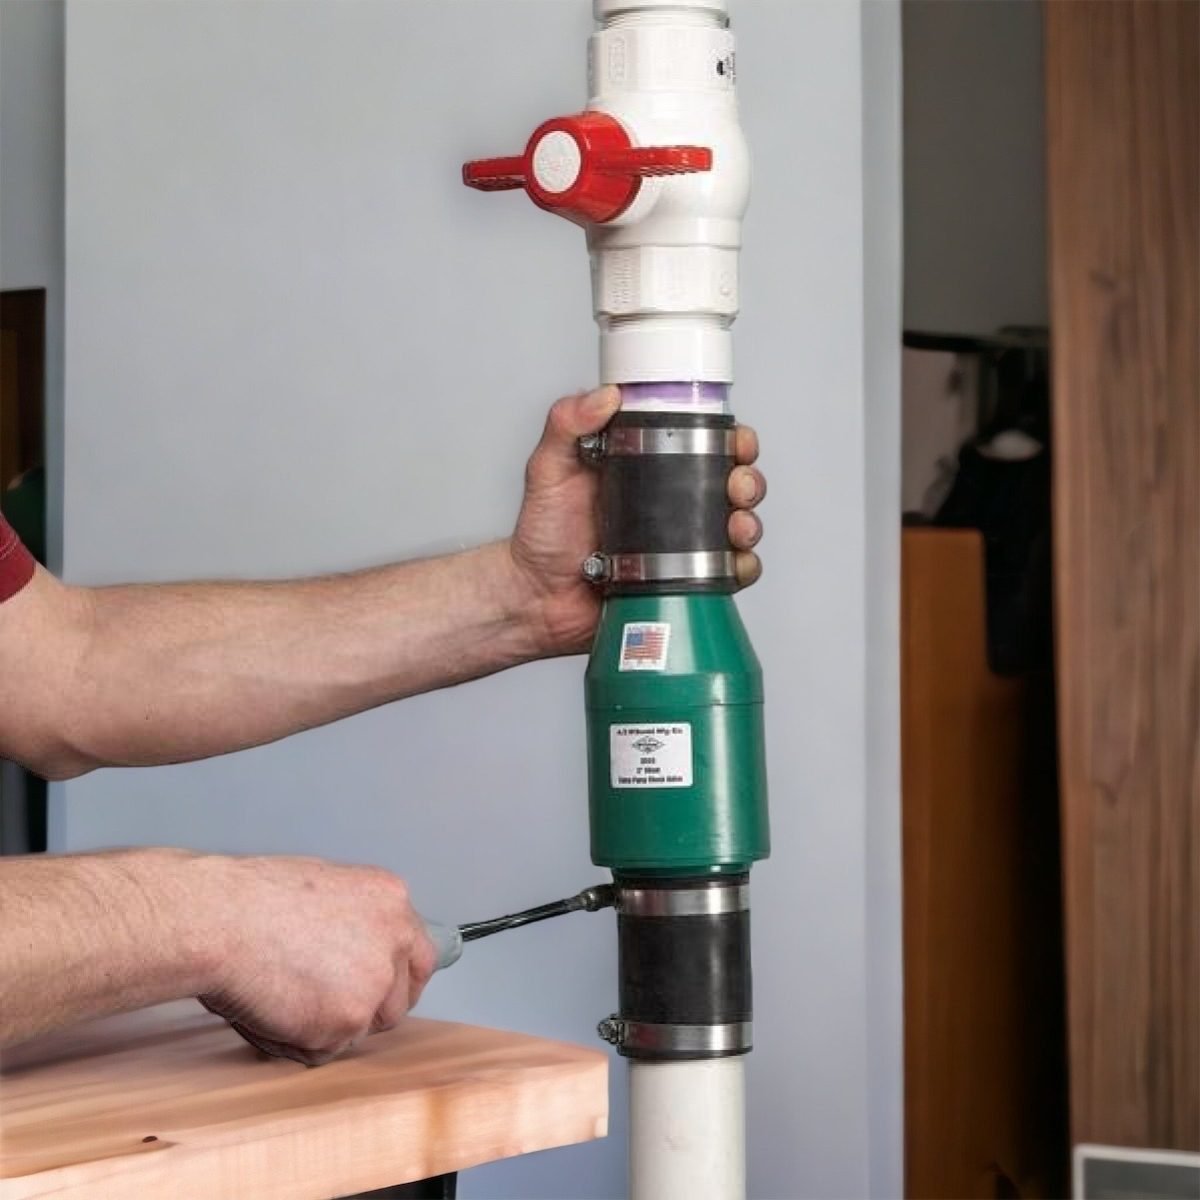
The check valve can be located vertically in the discharge line that extends from the pump. The valve is often placed directly beneath the pipe elbow structure that bends the vertical pipe into the horizontal direction of the discharge region.
Solution: Install The Check Valve
It’s time to start installing a new sump pump check valve. Here’s a step-by-step guide to help you install the check valve.
Step 1: Turn Off Your Sump Pump.
Before you begin working on your sump pump, you must turn it off. This will prevent it from turning on while you’re working on it and potentially causing injury.
Step 2: Locate The Discharge Pipe.
The discharge pipe is the pipe that carries water out of your sump pump and away from your home. Locate this pipe and take note of its diameter. This will help you choose the size of the sump pump check valve.
The diameter of the discharge pipe and check valve has to be about the same diameter so that they fit together.
Step 3: Measure And Cut The Pvc Pipe (if necessary).
If your sump pump check valve is a different diameter than your discharge pipe, you’ll need to cut a piece of PVC pipe to connect the two. Measure the distance between the sump pump and the discharge pipe, then use a pipe cutter or hacksaw to cut the PVC pipe to the appropriate length.
Step 4: Clean And Apply Cement.
Clean the ends of the PVC pipe that will attach to the discharge pipe and sump pump check valve using a PVC primer. This will help the pipe adhere properly.
Also, apply PVC cement to the ends of the pipe and the sump pump check valve and connect the two, ensuring it is secure.
Step 5: Secure The Check Valve.
Tighten the sump pump check valve onto the discharge pipe using an adjustable wrench and ensure the valve is securely kept and won’t come loose over time.
Then wrap the threads of the sump pump check valve where it connects to the discharge pipe using Teflon tape. This will help create a tight seal and prevent leaks.
And once you’ve completed the installation process, turn your sump pump back on and test the pump check valve to ensure it’s functioning correctly.
Damaged Impeller
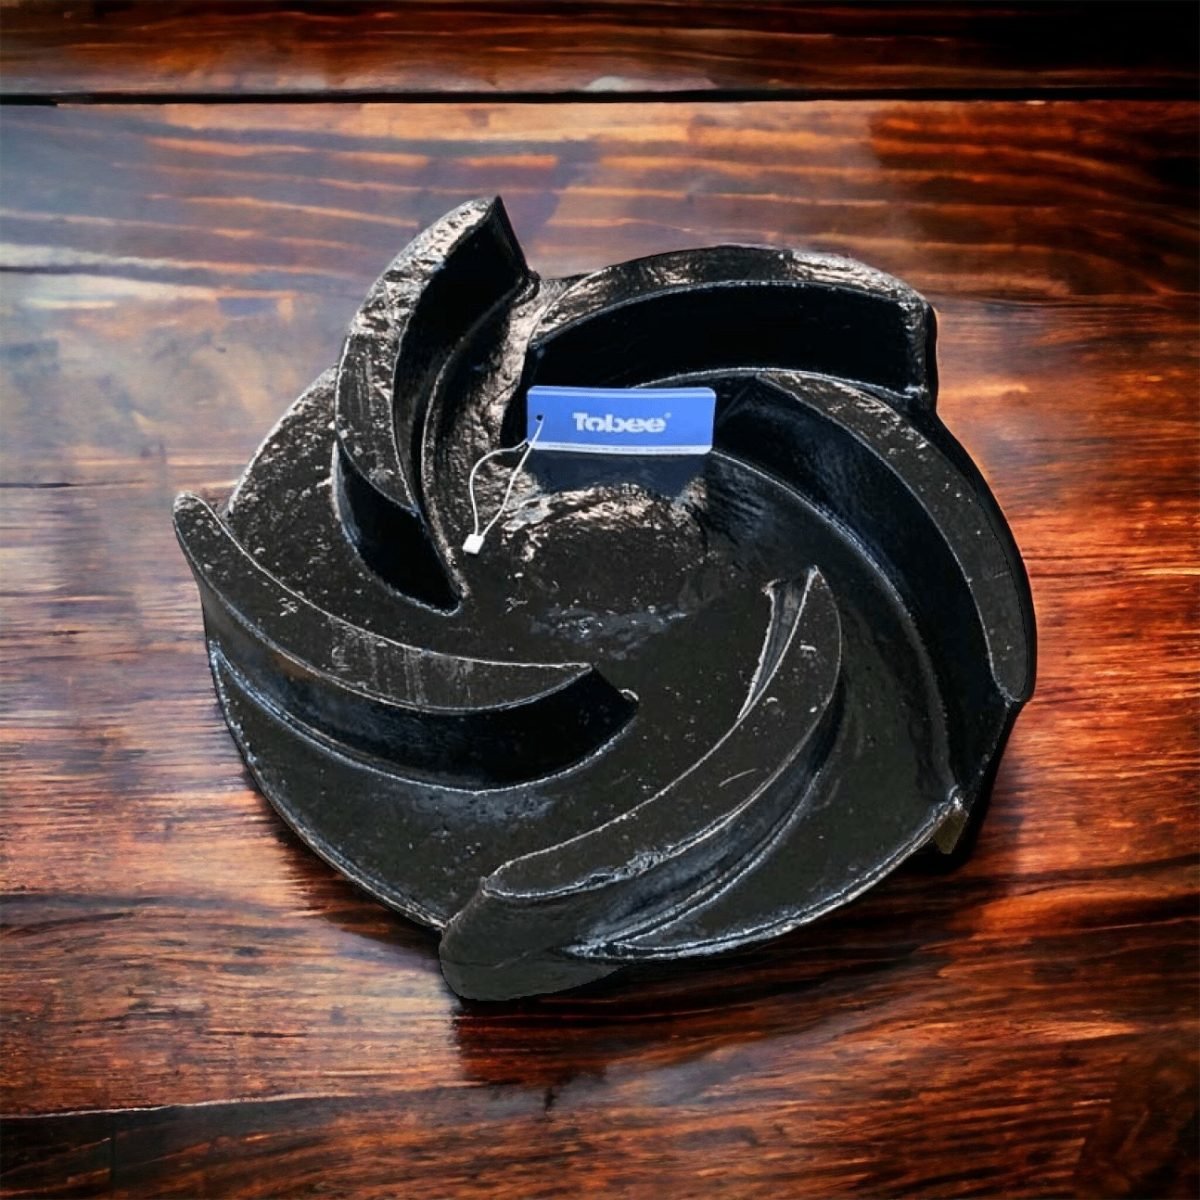
The impeller, which is a part of the sump pump, pumps water out of the sump pit. If the impeller is damaged, it can cause a gurgling noise. This is because the impeller is not working correctly, causing the sump pump to work harder than it should.
In most sump pumps, the impeller can find at the bottom of the pump housing, just above the intake screen. This placement allows the impeller to draw in water and move it upward, expelling it through the outlet and into a discharge pipe.
To troubleshoot and fix a damaged impeller,
Solution: Replace The Impeller
Here is the step-by-step guide to troubleshooting and repairing a damaged sump pump impeller
Step 1: Shut Off Power
Before working on your sump pump, you’ll need to turn off the power supply. This can do by unplugging the pump or turning off the circuit breaker that manages the pump.
Step 2: Inspect The Impeller
Next, you’ll have to remove the sump pump cover to access the impeller. Use a screwdriver or wrench to remove the bolts or screws holding the cover. Once you remove the cover, you can see the impeller.
Examine the impeller with a flashlight for any indications of damage, such as cracks, chips, or missing components. You should also check the impeller for any debris or buildup that could be causing it to malfunction.
Step 3: Remove And Replace Impeller
If you have identified that the impeller is damaged, it will need replacement.
Begin by disconnecting the impeller from the motor shaft. You may need pliers or a wrench to loosen the impeller nut or set screw. Once the impeller is loose, gently pull it off the shaft. Take note of how the impeller is positioned so that you can install the replacement impeller in the correct orientation.
Before installing the new impeller, clean the impeller housing and motor shaft to ensure there is no debris or buildup. To ease the impeller movement into position, apply a small amount of lubricant to the motor shaft.
Then, carefully install the replacement impeller, ensuring it is properly aligned and tightened in place. Finally, replace the gasket and pump cover and tighten the bolts or screws.
Step 4: Reassemble And Test
Once you have replaced the impeller and reassembled the sump pump, turn the power back on and test it to ensure it works correctly.
The pump should be able to remove water from the sump pit efficiently and without unusual noises or vibrations. You may need to repeat the repair process or call a professional if you notice any issues, such as reduced pumping capacity or strange noises.
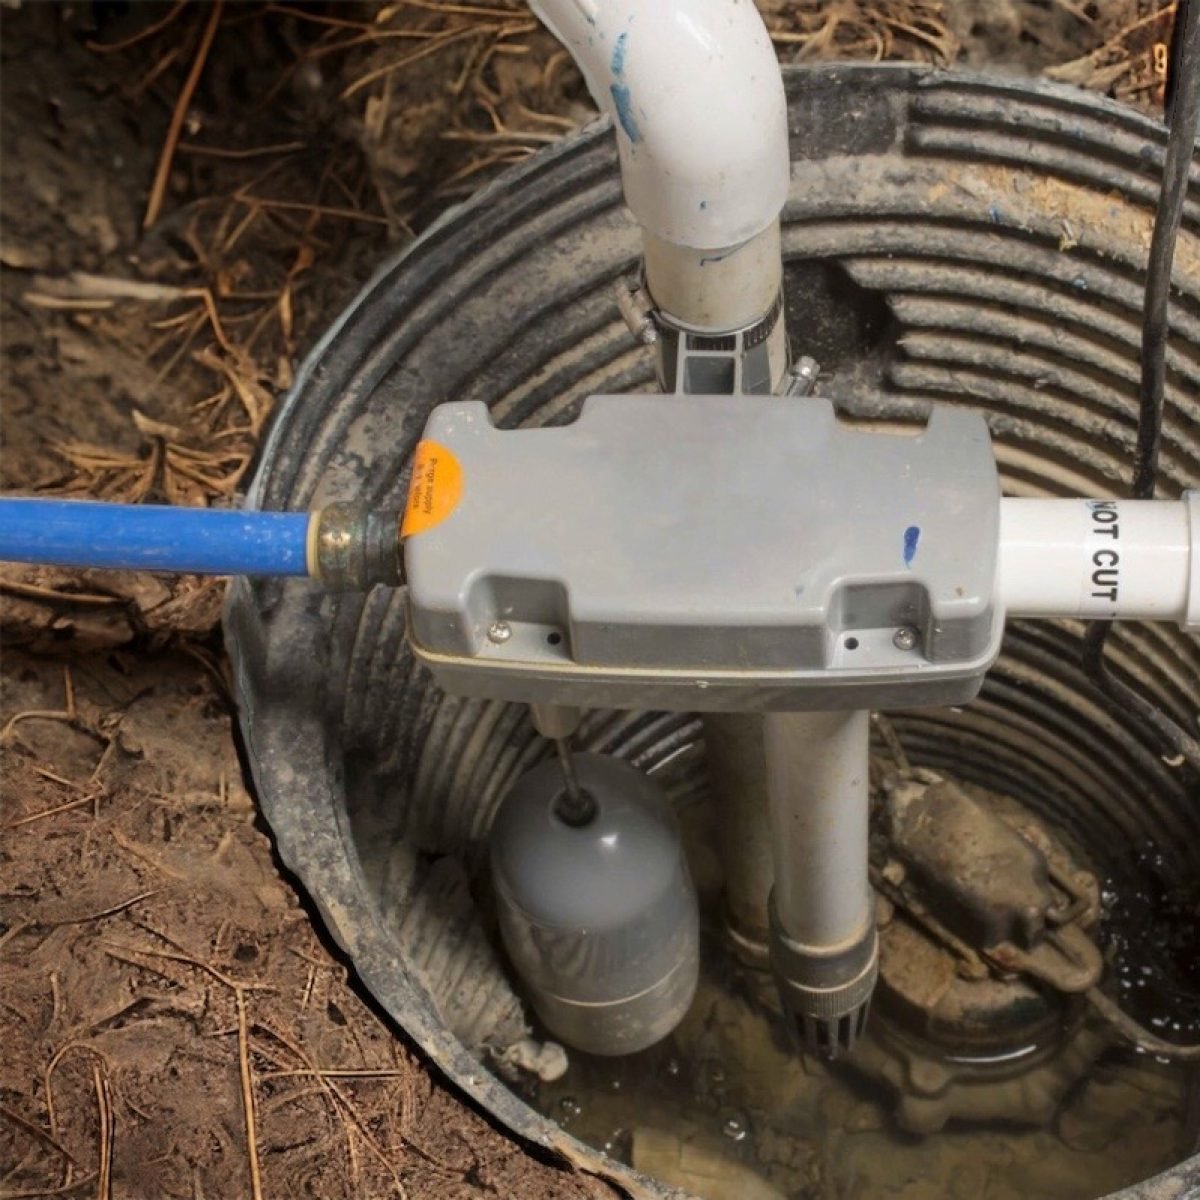
Loose Or Damaged Float Switch
A loose or damaged float switch may be another reason your sump pump is gurgling.
The float switch is a device that turns the sump pump on and off based on the water level in the sump pit. If the float switch is loose or damaged, it can cause the sump pump to turn on and off frequently, leading to a gurgling noise.
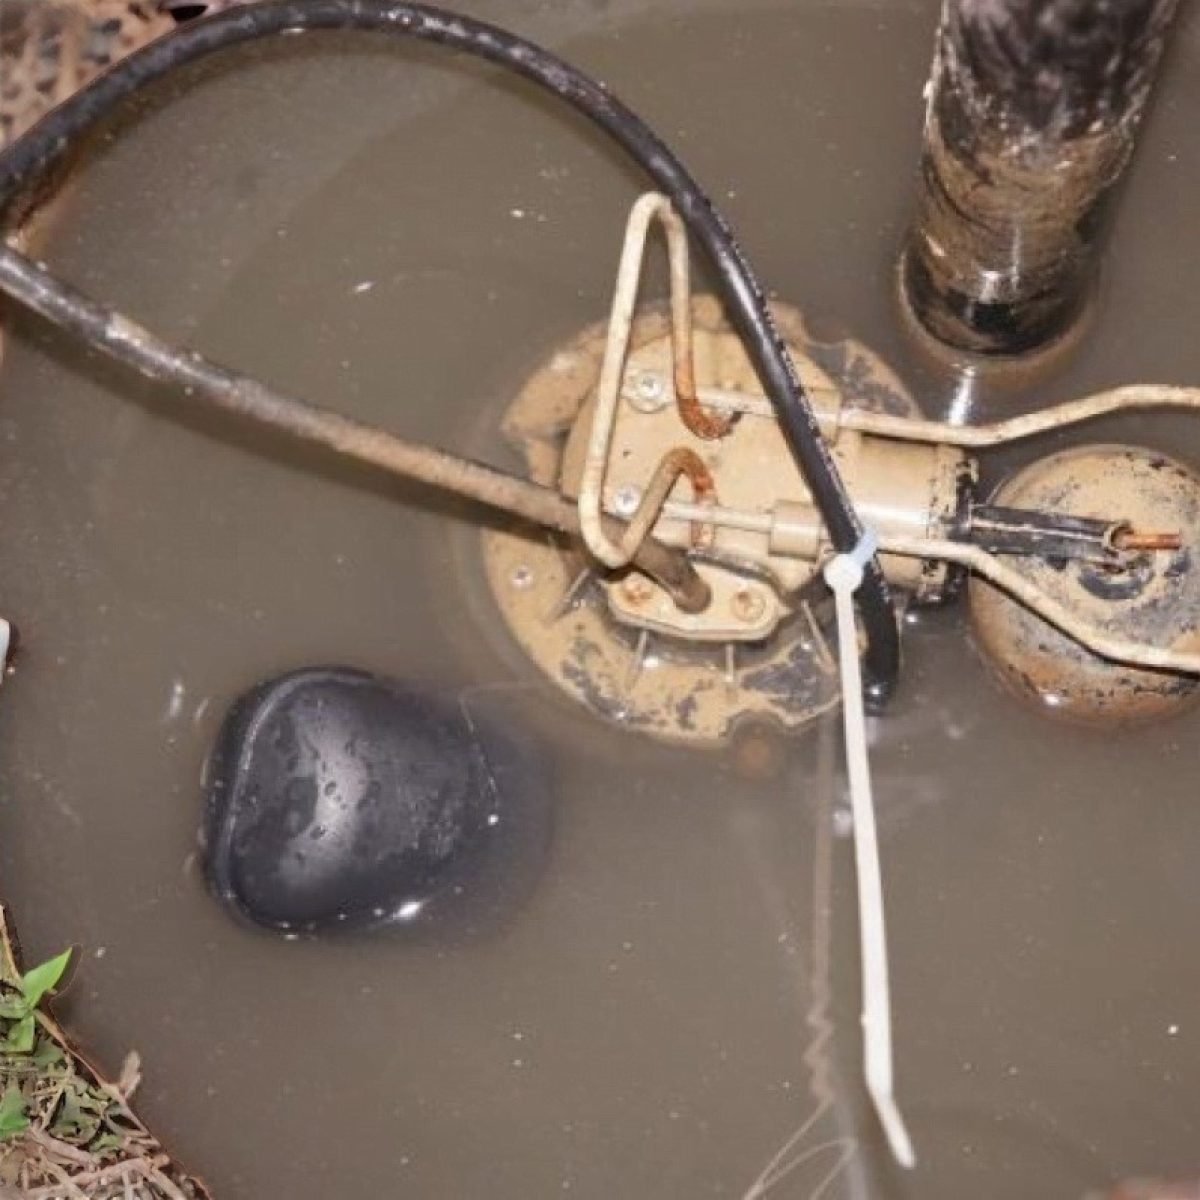
If the float switch is damaged, it will need a replacement; if it is loose, tighten it back into place and reattach the sump pump to the sump pit.
To troubleshoot and fix a float switch:
Solution: Replace the Float Switch
To replace your pump float switch, you will need to buy a new one for installation and can start replacing it. Here are the steps you’ll need to follow:
Step 1: Turn Off the Power
Before you begin the replacement process, it’s essential to turn off the power to the sump pump to avoid any electrical shock or damage. Locate the circuit breaker that controls the sump pump and switch it off.
Step 2: Remove the Old Float Switch
Once the power is off, you can begin removing the old float switch. Depending on your switch type, you may need pliers or a wrench to loosen any screws or bolts that hold the switch in place. Once the switch is loose, carefully remove it from the sump pit.
Step 3: Disconnect The Wires And Connect New Switch
With the old switch removed, you’ll need to disconnect the electrical wires connected to it. Use wire cutters or strippers to remove any connectors or tape holding the wires in place, and carefully separate the wires from the old switch.
Next, it’s time to connect the wires to the new switch. Use wire connectors to attach the wires to the appropriate terminals on the new switch and secure them with electrical tape.
Step 4: Install The New Switch
With the wires connected, you can now install the new switch. Carefully lower the float switch into the sump pit, ensuring the cord or rod is long enough to allow the controller to move freely. Use pliers or a wrench to tighten any screws or bolts that hold the switch in place, and ensure that it is securely attached to the sump pump.
Step 5: Test The New Switch
Finally, it’s time to test the new switch to ensure it works properly. Turn the power back on to the sump pump and wait for the pump to fill with water. As the water level rises, the float switch should activate the pump and begin pumping out the water. If the pump doesn’t turn on or the switch doesn’t activate, double-check your connections and ensure everything is securely in place.
Failing Pump Motor
The pump motor is part of the sump pump that powers the impeller. If the pump motor fails, it can cause the sump pump to work harder than it should, leading to a gurgling sound.
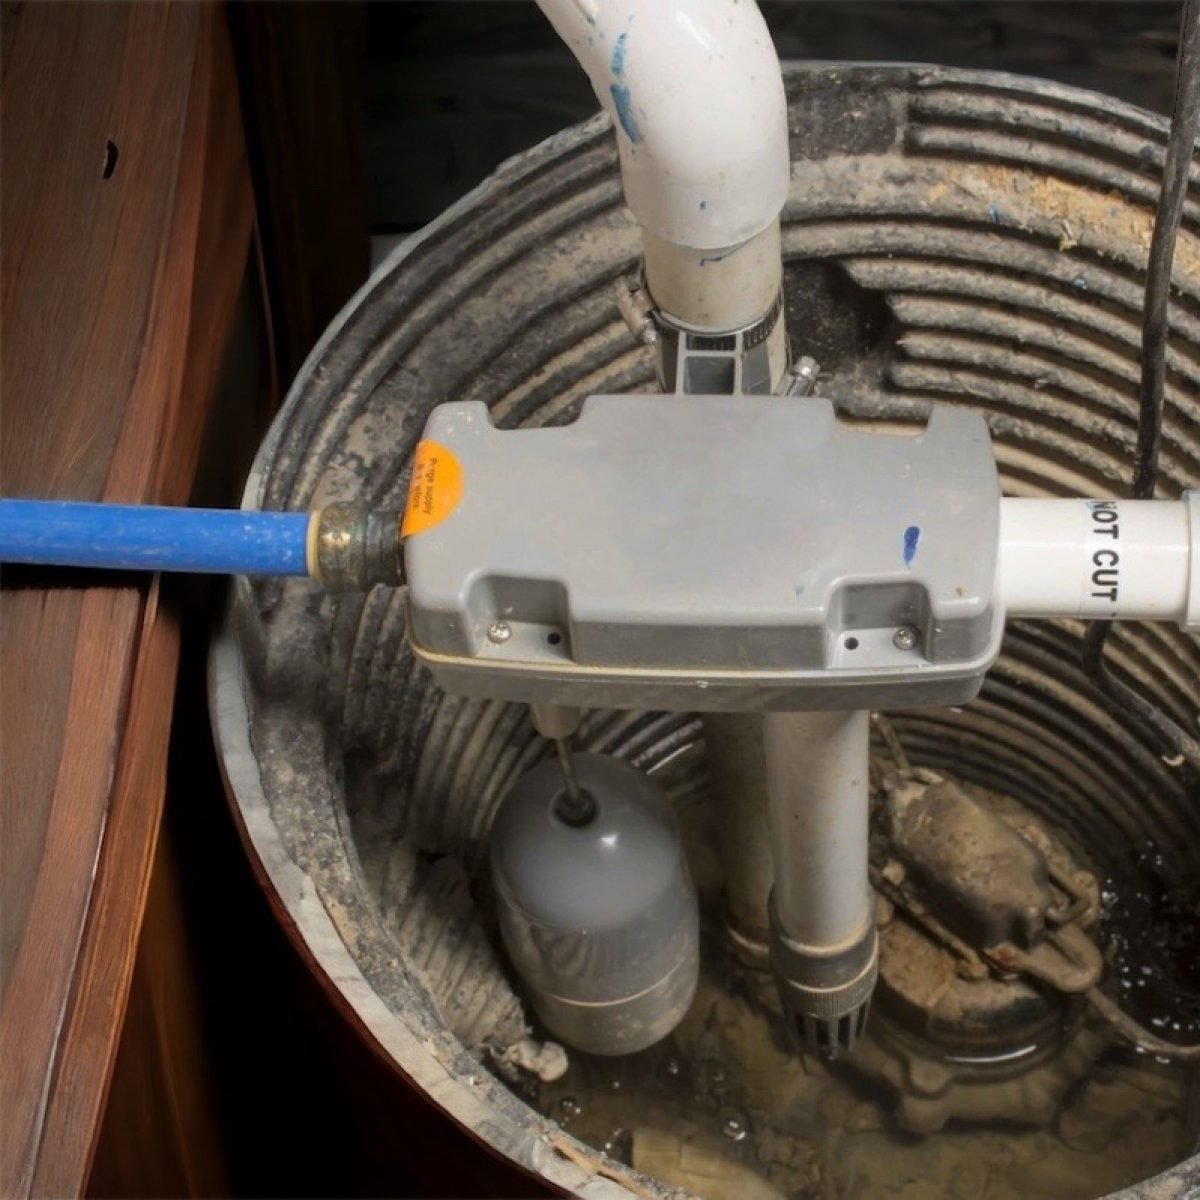
In a typical sump pump, the motor will be above the water level in a sealed housing to keep the motor dry and prevent water from damaging it. The motor also connects to an impeller that pumps water out of the sump. When the motor turns, the impeller rotates, creating a suction that draws water into the pump.
Solution: Replace Pump Motor
To troubleshoot and fix a failing pump motor, here is a step-by-step guide! Let’s dive into the step-by-step process of replacing a sump pump motor.
Step 1: Turn Off The Power
Before starting any work on your sump pump system, it is crucial to turn off the power to avoid electrocution. Locate the circuit breaker that controls your sump pump and turn it off. Next, disconnect the power cord from the sump pump motor. Use pliers to remove the wire nuts and separate the wires.
Step 2: Detach Impeller And Motor
Remove the housing and use a wrench to remove the impeller from the old motor and keep it safe, as you must attach it to the new motor. Remove the screws that hold the old motor in place using a screwdriver and gently lift it from the sump basin.
Step 3: Install The New Motor
Carefully lower the new motor into the sump basin and attach it using the screws you removed in Step 3. Also attach the impeller to the new motor using the wrench and make sure that it is securely in place.
Step 4: Reconnect And Test The Motor
Using pliers, reconnect the wires to the new motor and secure them with wire nuts. Turn the power on and test the new motor by pouring water into the sump basin. The motor should turn on and pump the water out of the basin.
Once you are satisfied that the new motor works correctly, apply a silicone sealant around the sump basin to ensure it is watertight.
Tips To Prevent Sump Pump Gurgling In The Future
Preventing sump pump gurgling in the future is essential to ensure that your sump pump is working efficiently and effectively. Here are some tips to avoid the sump pump making gurgling noise in the future:
- Regular maintenance is essential to the longevity and efficiency of your sump pump. Schedule regular inspections and cleaning to ensure your sump pump operates correctly.
- Installing a backup power source can ensure that your sump pump continues functioning during power outages, preventing water from accumulating and causing a gurgling sound.
- Proper installation is critical to the functioning of your sump pump. Ensure your sump pump arrangement is correct and that all components work perfectly.
- Monitoring the water level in your sump pump can ensure that your sump pump is adequately supplied and able to keep up with the amount of water that needs to be pumped out.
Follow the tips mentioned above to prevent the sump pump from making gurgling noise and maintain an efficient system functioning.
Similar Tutorials To Check Out!
- “5 Best Moisture Meters For Your Drywall Needs”: Having the best moisture meters on hand is essential to detect any potential issues before they become significant problems. In this article, I will share the 5 best moisture meters for drywall needs.
- “Wayne ESP25 Review: Is This Worth Your Investment?”: Wayne ESP25 is a popular choice among homeowners.
- But does it live up to the expectations? Find out from this Wayne ESP25 review and explore its features, benefits, and drawbacks.
- “Zoeller M53 vs. Liberty 257: Which One To Choose?”: Wondering which among Zoeller M53 and Liberty 257 is best? In this article, I will compare Zoeller M53 vs. Liberty 257, and explore each pump’s features, benefits, and differences.
- “Liberty SJ10 Review: Is It Worth The Investment?”: Wondering if the Liberty SJ10 sump pump is the right choice for your home? Then this Liberty SJ10 review is for you!
Conclusion
A gurgling sump pump can be a warning sign of a problem with your plumbing system. By understanding the top 5 reasons why your sump pump is gurgling and how to troubleshoot and fix the issue, you can ensure that your home is protected from water damage and flooding.
Remember to take preventative measures to avoid future issues and call in a plumbing professional if you cannot fix the problem yourself.
FAQs On Why Your Sump Pump Is Gurgling
1. Why is my sump pump making gurgling noises?
Airlocks or clogs typically cause gurgling sounds in sump pumps. It might also be a warning sign that the motor on the pump or another part needs repairing.
2. How can I fix a gurgling sump pump?
The most common solution for a gurgling sump pump is to clear any clogs or obstructions in the pipes. If the check valve is the source of the problem, it may need to be repaired or replaced.
3. Is the sump pump making gurgling noises dangerous?
In most cases, a gurgling sump pump is not dangerous. However, if the pump exhibits symptoms of a problem, it can be dangerous and must fix as soon as possible.
4. Is a sump pump making gurgling noise cause flooding?
In rare cases, a gurgling sump pump could indicate a more severe problem, such as a damaged or collapsed sewer line. If you notice foul odors, slow drains, or other signs of a sewer problem, you must act quickly to prevent flooding and protect your health.


Michael Bowen
Michael Bowen is an ambitious entrepreneur who has been in the business of building homes since he was 19. Michael's commitment to honesty, integrity, and high-quality workmanship has earned him a reputation as one of the best in the business.