Everything You Need To Know About Crawl Space Encapsulation
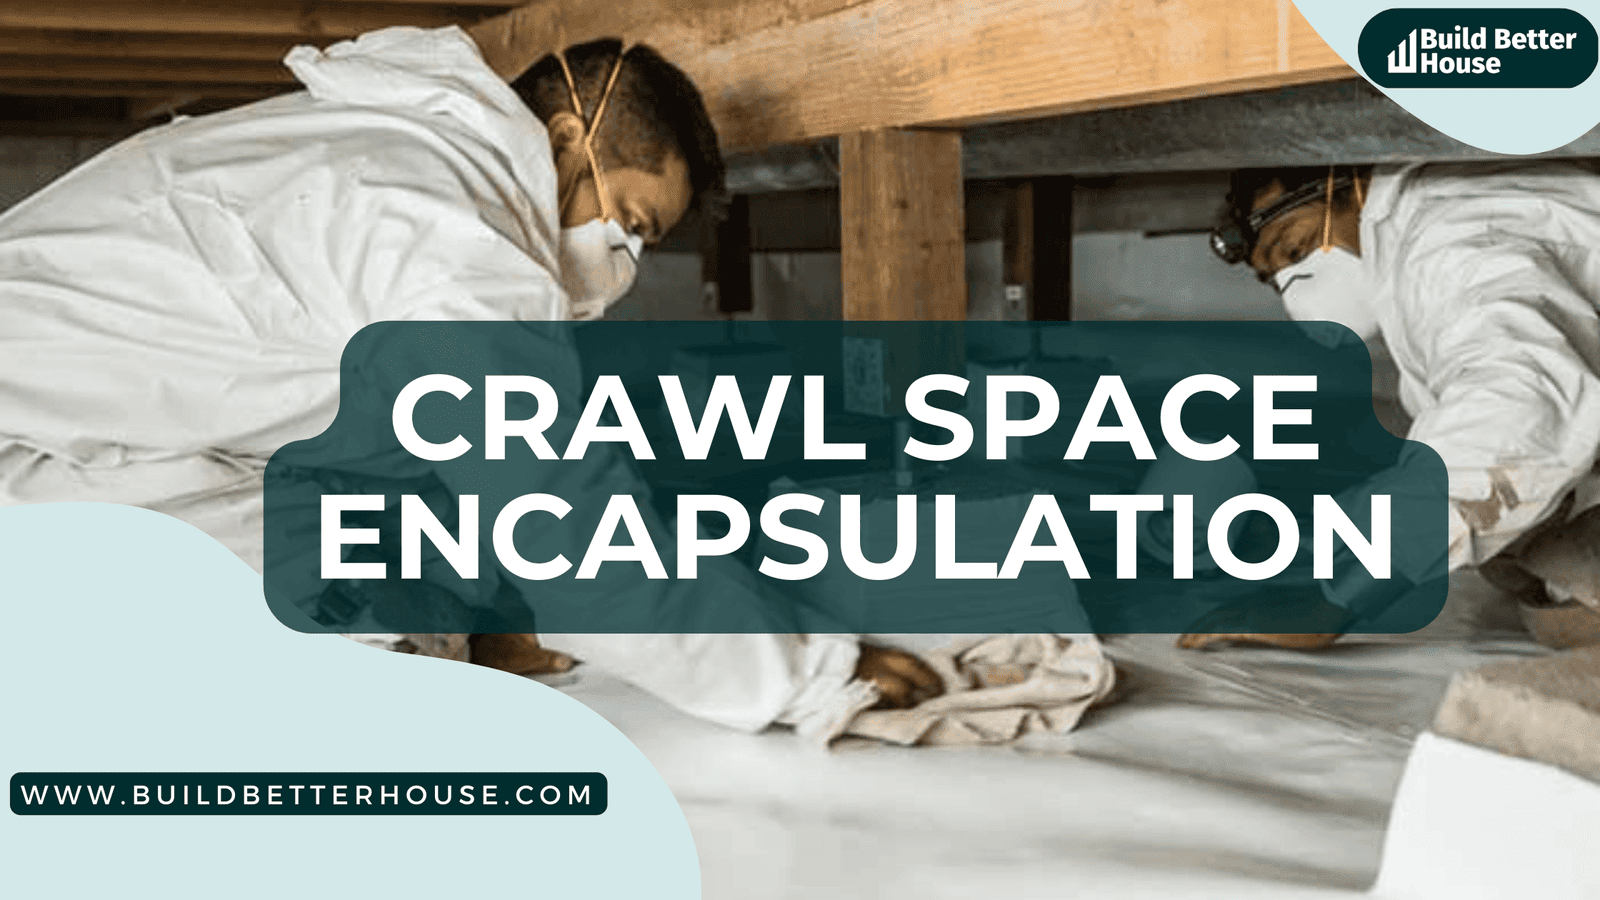
Moisture in your home can create conditions that lead to structural damage, which can be expensive to fix. A crawl space encapsulation system controls moisture in your crawl space and can help prevent future structural issues.
Most homes with open-vented subterranean spaces have moisture-related problems, such as mold and fungal growth. These concerns might jeopardize the home’s structural integrity and health.
Experts advocate a professional grade ‘crawl space encapsulation’ to avoid these concerns. What makes this home improvement worthwhile? How do you go about encapsulating a crawl space?
If you’re asking yourself these questions, you’ve come to the right place. This detailed article covers all you need to know about crawl space encapsulation.
What is crawl space encapsulation?
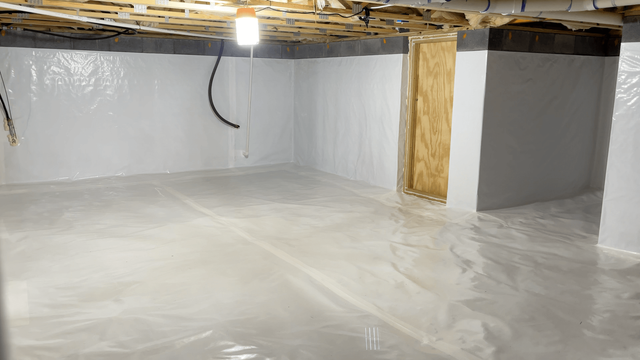
Crawl space encapsulation entails adding a heavy-duty moisture barrier to your dirt floor, sealed foundation vents, insulated walls, and a crawl space dehumidifier.
Crawl space encapsulation is most effective when the space is entirely sealed. Once the room has been encased, you can use a dehumidifier to help regulate the moisture levels in the area.
How to encapsulate a crawl space: 5 simple steps
Now, as we discussed its pros and cons, It’s time to encapsulate a crawl space! The steps are as follows:
Examine your crawl space
Before encapsulating your crawl space, you should inspect its current state. The building floor plan may be helpful if your crawl space is huge or has a sophisticated layout.
Here are some items to consider when conducting your inspection:
- Grading of land – Ensure the dirt under and surrounding your foundation is correctly graded before adding anything to your crawl space. Water from rain, snow, or your garden hose should not pool around the house.
If your property is poorly sloped, water can infiltrate the earth and invade your crawl space. Your property’s land grade changes over time.
As a result, it’s a good idea to check for grading errors frequently. A sloping slope away from the house is essential for avoiding flood.
If you notice that your land grading is off, you can fix it by adding dirt. It is strongly advised to seek the advice of a specialist for this step. A land grading specialist can tell you if your slope needs to be repaired and what solutions are available.
- Drain system- Examine your gutters, downspouts, and drains. Keep your gutters clean to keep them from overflowing.
Analyze your downspouts as well. A clogged downspout that can’t withstand heavy rainfall might strain your home’s foundation.
It has the potential to flood your crawl space. Clogged drains must also be unclogged to avoid additional water troubles in your crawl space.
Remove any puddles or standing water in your crawl space. Ascertain that the environment is dry and clean.
- Mold – Encapsulating your crawl area while mold is still present is a bad idea. Mold may be present in your crawl area if you smell anything musty and have allergies.
Examine your baseboards and other crawl space surfaces carefully. Mold can appear in various colors, including black, green, brown, white, yellow, and orange.
To remove the mold, wear personal protective equipment. Some disposable goggles, gloves, respirators or masks, and coveralls will suffice.
On all afflicted surfaces, apply a mold-removal spray or a mold-removal cleanser. Using a sturdy brush, scrub away any leftover mold. If the mold in your crawl space is extensive, you should consider contacting local mold removal experts.
- Backdraft of an appliance– Backdrafts occur when the flow of gases from combustion appliances (such as your water heater or gas furnace) reverses. The gases are not properly evacuated.
Instead, the exhaust is drawn back into your residence. To avoid the accumulation of harmful gases inside your crawl space, look for a backdraft.
- Pests – Before encapsulating, ensure that any termite, rat, or other pest problems have been resolved. Sanitize the area once you’ve eliminated any pest infestations.
Clean your crawl space thoroughly to remove any dead critters causing an unpleasant stench.
- Structural deterioration– Repair any damaged areas of the crawl space. This includes decaying timber and other floor portions that may need to be replaced.
If the floor of your crawl space is uneven, you should level it. After making the necessary repairs, ensure that no unused building materials are left around the area.
Finish the crawl space
You’re ready to seal your crawl space now that it’s clean and all difficulties have been fixed. We must adequately seal the vents and apertures to prevent outside air from entering the space.
The most typical materials used in this step are foam boards and spray foam. You can also use foam board on your crawl space door.
Seal any gaps completely. Don’t forget to seal any floor cracks and gaps.
Include a thermal barrier
A thermal barrier will help you control the temperature within your crawl space. Because less energy is required to heat or cool the air, this can result in energy savings for your home.
For your walls, you can use foam insulation boards. This will prevent any outside air from entering.
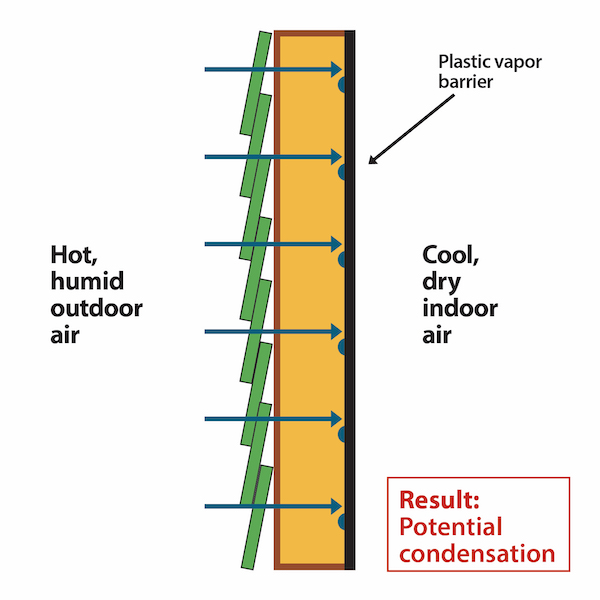
Incorporate a plastic vapor barrier
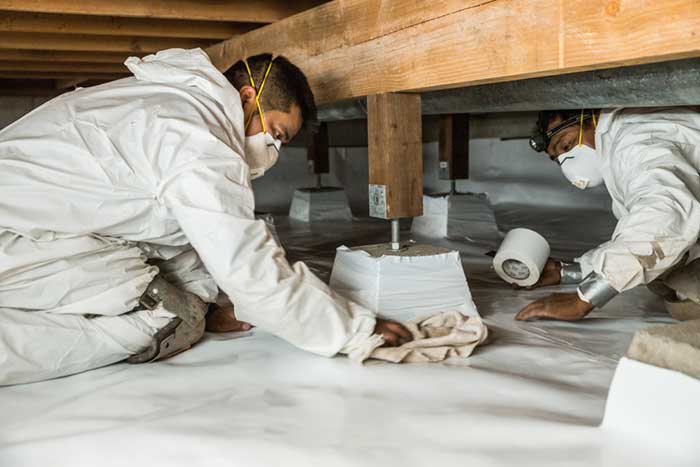
Cover the walls and flooring of your crawl area with a plastic vapor barrier as the following step. The most popular material for the job is heavy-duty polyethylene.
It should be noted that the thickness of this material may vary. Apply a thicker plastic vapor barrier on the ground than on the walls.
Before cutting and installing, take accurate measurements of the region. When cutting, leave enough material so the plastic barrier overlaps by several inches at each seam.
Cut around piers and piping appropriately. Make extensive use of heavy-duty waterproof tape or other powerful adhesives.
Maintain a dry crawl space
Your crawl space should always be kept dry and free of moisture. The optimal crawl space humidity level is 30-60%.
A humidity level of 50-55 percent is ideal. A crawl space drying system will be required to maintain the proper humidity. Your best bet is to use a dehumidifier with a humidity monitor.
These are the five simple steps you may take to encapsulate your crawl space. Just adhere to them to efficiently complete your work.
How much does it cost to encapsulate a crawl space?
Crawl space encapsulation typically costs around $7,500. On rare occasions, the cost may exceed $20,000, depending on a range of criteria such as:
- The dimensions of your crawl space
- The materials you use, state it is in
- The contractor you employ
Before choosing a contractor, do a comparison shopping to get the most economical crawl space encapsulation services.
Crawl space encapsulation: What not to do?
When spending thousands of dollars or more on a home improvement, you want to ensure everything is done correctly. Here are a few things to avoid while enclosing your crawl space.
Do not encapsulate if there is no sealable space
While encapsulating your crawl area will keep it dry, it will not work if substantial air gaps allow outside air to enter.
It is vital to shut out the external air sources when performing crawl space encapsulation so that the dehumidifier can condition the air below.
Remember the importance of a drainage system
Some homeowners believe that encapsulation will keep water out of their crawl space and that a drainage system is unnecessary. The error is that encapsulation does not prevent water intrusion or flooding beneath houses.
Water damage can be very costly to fix. Repairing a water-damaged foundation, for example, can cost up to $12,000.
Fiberglass should not be used between floor joists
You should only use fiberglass if you have opted not to seal, dehumidify, or condition your crawl space.
Avoid using fiberglass at all. The material needs to be fixed when it comes to crawling space insulation. The results are minor when the material is put in an unconditioned, ventilated room.
Because the material absorbs moisture, it loses its R-value. As a result, it is ineffective as an encapsulating material. Because of the weight of the water, fiberglass sags, causing holes in the encapsulation blanket.
Install a water drainage system that sends water away from your house to avoid circumstances where water sits against it. A french drain system or a sump pump can be beneficial.
Worse, most fiberglass batches are held together by a urea-based glue. Mold thrives when fiberglass, cement, and moisture come together—professional mold cleanup costs $500 to $6,000.
Do not forget the importance of professional installation
DIY home improvements are enjoyable and cost-effective for many homeowners. However, assuming you can accomplish the crawl space encapsulation project on your own is a foolish idea.
You risk squandering time, effort, and money if you don’t have the appropriate abilities and experience for crawlspace encapsulation.
Keep in mind the above “what not to do” tips to prevent any potential issues.
Crawl space encapsulation: Do’s
Now that we’ve covered what issues to avoid when encapsulating your crawl space, let’s move on to what you should do instead. Here are four suggestions.
Prepare the crawl space for encapsulation
Depending on its current status, it would help if you first prepared your crawl area. You may need to address the following issues:
Inadequate drainage around the foundation
Water may have seeped into your crawl space if your home lacks correct grading or has a poorly maintained drainage system. Do you notice any pools of water beneath your house? Before pursuing encapsulation, consult with a drainage company to handle these difficulties.
Mold development
Mold growth will almost certainly occur in a moist crawl area. Examine the floor joists and HVAC equipment for mold development. Before you begin the encapsulation procedure, deal with the mold.
Back drawing from appliances
Conduct a safety examination to ensure that your combustion appliances are not emitting carbon monoxide into your environment. Enclosing your crawlspace without addressing this issue could endanger you and your family.
You can improve the efficiency and ease of your work by adhering to the tips listed above.
Crawl space encapsulation: Seal floor and vents
When you’ve finished preparing your crawl space for encapsulation, it’s time to get serious about the project. Your goal should be to enclose the crawl area as much as possible from the damp dirt and outside air. To accomplish this, be sure to:
Install a heavy plastic vapor barrier
The goal is to keep any moisture from entering the crawl area. Attach the vapor barrier to the walls, equipment, piers, air handler, and so on, in addition to the floor.
Seal each vent and opening
You want to keep the elements out of your crawl space. The best method to do so is to close off all outdoor apertures. Spray foam and foam board can be used.
Gaps and cracks in the air seal
After sealing the primary openings and vents, work on any remaining reaming cracks and gaps. Band joists, plumbing penetrations, HVAC drain line runs, and wiring is examples.
Crawl space encapsulation: Dehumidifier needs
The humidity in your area will fluctuate based on the climate if you do not have a drying system. It’ll only be a matter of time until moisture accumulates.
This will result in mold, bacteria, poor indoor air quality, and other problems. A proper humidity level must be maintained to avoid moisture buildup.
One of the most effective methods is to use a dehumidifier. Now, let’s look at why:
- The humidity in the crawlspace rises, and the dehumidifier recognizes the change and begins to work. With the supply air approach, this is never conceivable.
- They can operate even when your HVAC system is turned off. You won’t have to worry about a soggy crawlspace during the shoulder seasons because the dehumidifier adjusts to conditions in its installed space.
- A dehumidifier eliminates the possibility of extra crawlspace air penetrating the property. The dehumidifier eliminates moisture from the air; it does not exchange “old” crawlspace air for “new” HVAC system air.
The cost is the only downside of employing a dedicated crawlspace humidifier instead of supplied air.
You must purchase the dehumidifier and will most likely have it installed by your encapsulation contractor.
Dedicated crawlspace dehumidifiers are durable, high-quality machines. You won’t have to be concerned about them failing only a few years later.
Crawl space encapsulation: Why need a professional?
DIY encapsulation might need improvement, particularly for homeowners needing more training or experience in crawl space encapsulation. The best course of action is to hire a reliable crawl space encapsulation contractor to complete the work for you.
A professional provides essential experience to the project, ensuring it is assembled correctly.
Professionals can also perform the process much faster than you because they have the appropriate tools and abilities. And, because you obtain a high-quality encapsulation installation, you won’t have to worry about replacing the encapsulation anytime soon.
Wrapping up
By reading this article post, we hope you know how to encapsulate a crawl space. Isn’t it simple?
However, before encapsulation, look for existing mold, appliance backdraft, and land grading issues. When everything is in order, just follow the simple instructions we mentioned, and you’ll be done in no time.
Don’t forget to maintain your crawl area dry after encapsulation. As a result, a dehumidifier will be your crawl space’s protector. Good luck, and remember to bring your safety equipment!
Read more:
Best Paint for Basement Stairs In 2023
3 Best Pedestal Sump Pumps For Your Home
Sump Pump Overflow Drain: How To Install + Benefits
Top 4 Boat Sump Pumps In 2023 & How To Install Them
How To Stop The Pool Pump From Making A Humming Noise?
7 Best Hot Water Recirculating Pumps in 2023: Tested & Compared


Michael Bowen
Michael Bowen is an ambitious entrepreneur who has been in the business of building homes since he was 19. Michael's commitment to honesty, integrity, and high-quality workmanship has earned him a reputation as one of the best in the business.